Friday, August 14, 2020

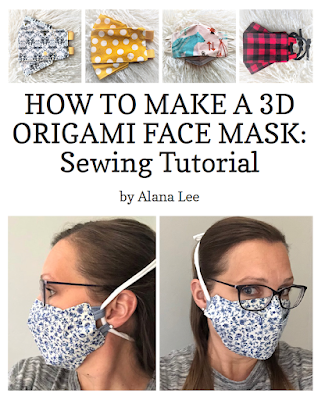
How to a Sew 3D Origami Face Mask (Illustrated)

Size

Rectangle Dimensions

Corner Crop

Child S-M (5-10 yrs)

7.5” x 6”

1.75”

Child L-XL (11-12 yrs)

8.5” x 6.5”

1.75”

Teen/Adult XS

9.75” x 7”

2”

Adult S-M

10.25” x 7.25”

2.25”

Adult L-XL

10.5” x 8”

2.25”

This illustrated sewing tutorial will use the Adult S-M size of my 3D Origami Fabric Face Mask. This tutorial differs slightly than the original tutorial (linked above) in two ways: this one instructs you to insert ear tie tabs/straps before creating a trifold and to topstitch all the way around once ear tie tabs/straps are inserted. This is my preferred method after sewing hundreds of this design.


Step 1: Place two pieces of pre-cut mask fabric with right sides together. (Click here to see how to create a template to make cutting easier.) Sew using a 1/4" seam allowance along the edges marked in the illustration, leaving the right and left sides open.

Step 2: Notch corners to prepare for turning inside out.

Step 3: Before turning inside out, fold open ends in at 1/4" and iron flat. Repeat on back side. You should have ironed 4 folds. Next, flip inside out and press seams flat.

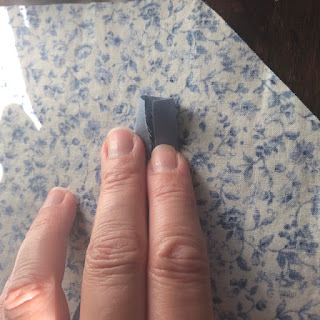
Step 4: For this step, you can use ribbon (heat treat the ends) or bias tape straps. The straps or tabs will hold the ear ties in place. I cut mine at 2.5" and slide them in 1/4" into the openings. Topstitch around the entire octagon starting on the right side. I use wonder clip to hold my straps in place, but you can also place the straps as you go. Avoid using long stitches for this portion because you want to securely tack the straps into place. 


Step 5: Create a trifold by folding the top and bottom flaps toward the center. You want to make sure the height of the trifold correctly matches the size you are sewing.

Size

TriFold Height

Child S-M (5-10 yrs)

2.5”

Child L-XL (11-12 yrs)

2.5”

Teen/Adult XS

2.75”

Adult S-M

2.75”

Adult L-XL

3.5”

Step 6: Your trifold should resemble the illustration below.

Step 7: You will sew the trifold in place. Use the appropriate spacing from the right and left end depending on the size of the mask you are sewing (see table below). Then use a 1/8" seam on the top and bottom of the rectangle. Remember to backstitch to secure the ends of your broken rectangle.

Size

Trifold Edge Allowance

Child S-M (5-10 yrs)

1”

Child L-XL (11-12 yrs)

1”

Teen/Adult XS

1.25”

Adult S-M

1.25”

Adult L-XL

1.25”

Step 8: Open the flaps outward and fold the ends with straps toward each other. While the mask is folded, pin the flap-folds in place as shown in the illustration. (I prefer to use wonder clips for this step.) You will have four places with pins or clips to hold the folds in place while you sew--this creates the origami design.

Step 9: This part is easiest if you open the mask partially and sew with the interior fabric facing up. The mask will not lay flat at this point because of the origami folds. Tack the origami folds in place as illustrated below.


Step 10: You're almost done! Add ear ties (about 10" for each ear loop if using t-shirt yarn), or create ties that wrap around your head from t-shirt yarn or parachute cord (with a cord lock).


Sizing Guide

Size

Rectangle Dimensions

Corner Crop

Trifold Height

Trifold Edge Allowance

Child S-M

7.5” x 6”

1.75”

2.5”

1”

Child L-XL

8.5” x 6.5”

1.75”

2.5”

1”

Teen/Adult XS

9.75” x 7”

2”

2.75”

1.25”

Adult S-M

10.25” x 7.25”

2.25”

2.75”

1.25”

Adult L-XL

10.5” x 8”

2.25”

3.5”

1.25”

Check out my other 3D Origami Fabric Face Mask tutorials:

How to Make an Origami Fabric Face Mask (tutorial with actual pictures)

How to Create a 3D Origami Face Mask Tracing Template

How to Create a 3D Origami Mask Tracing Template

This tutorial will show you how to create a pattern template to trace "cut" lines onto your fabric for my 3D Origami Face Mask. I recommend using a heavy cardstock to create your tracing template. This really simplifies and speeds up the cutting process so you can move on to sewing your masks. I include five sizes: Child S-M, Child L-XL, Teen/Adult XS, Adult S-M, Adult L-XL. 


For the full sewing tutorial, see How to Make a 3D Origami Face Mask (with pictures) and this post with illustrations.


Step 1: Start by cutting out a rectangle according to your desired size. 


Size

Rectangle Dimensions

Child S-M (5-11 yrs)

7.5” x 6”

Child L-XL (11-12 yrs)

8.5” x 6.5”

Teen/Adult XS

9.75” x 7”

Adult S-M

10.25” x 7.25”

Adult L-XL

10.5” x 8” 


Step 2: To crop the corners, measure the appropriate distance (1.75”, 2”, or 2.25”; see table below) on both sides of the rectangle.


Size

Rectangle Dimensions

Corner Crop

Child S-M (5-10 yrs)

7.5” x 6”

1.75”

Child L-XL (11-12 yrs)

8.5” x 6.5”

1.75”

Teen/Adult XS

9.75” x 7”

2”

Adult S-M

10.25” x 7.25”

2.25”

Adult L-XL

10.5” x 8”

2.25”


Step 3: Once the corners are cropped, each template should resemble a rectangular octagon. 


Step 4: Place your cardstock template on clean, preshrunk, ironed fabric (two layers works better than one). Trace around the template with a pencil or pen. Cut along the marked lines.

Tuesday, May 26, 2020

How to Make an Origami Fabric Face Mask


The coronavirus/COVID-19/
SARS-CoV-2 pandemic, with its global reach, has resulted in both suggestions and orders that people wear face masks when in public or medical settings.

I have spent nearly two months sewing face masks to donate to medical workers, hospital guests, and my family and neighbors. I've tried making at least three different designs. Through trial and error and a lot of research, I designed this 3D Origami face mask pattern and tutorial to share with those who would also like to make masks to donate. It's my favorite pattern and fits the best, especially because it helps reduce fog on my glasses. (If the economic slowdown has impacted you, feel free to use this pattern to put food on your table.)
 
For a printer-friendly version of this DIY face mask sewing tutorial, click here.

You will need:
  • 100% cotton fabric (about 11” x 17.5”)
  • T-shirt yarn (or old t-shirt to make the ties; cut at 1.5” wide)
  • Sewing machine
  • Thread
  • Scissors
  • Pins
  • Iron and ironing board
1. Choose your size, and then cut 2 pieces of fabric: 7.25" x 10.25" (fits women/teens well), or 8" x 10.5" (fits most men).

2. Sew a 1/4" seam on six sides, leaving the right and left sides open.
3. Cut a strip 1.5" x 10". This will be sewn into straps later.

4. Fold strip edges to center (forming bias tape). No need to press. You can just get the end started and form it as you sew.

5. Sew about 1/4" seam through all four layers of fabric.

6. Now you have a strap that will be used to hold the ties in place.

7. Cut the strap into four pieces that are 2.5" long.

8. Cut notches in the four corners to create flat corners when the mask is turned inside out.

9. Turn inside out.

10. Flatten seams to prepare for pressing.

11. Fold in opened edges 1/4" or 3/8"and press all seams.

12. Closer look at the opened edges folded in and ironed.

13. Create a template to guide the folds in the next few steps. 2.75" for women; 3.5" for men.

14. Fold top over. The floral side will be the outside of the mask; the solid blue side will become the inside of the mask (that touches your face).

15. Fold the bottom up. Hold the folds in place.

16. Slide out the template.

17. Press the folds.

18. Now your mask should look like this.

19. Fold two straps and slide them in the top and bottom of the openings on the right and left side of the mask. Pin in place.

20. Sew a 1/8" seam to secure the straps and close the opening.

21. Repeat on other side. Right and left ends now have straps (to hold the ties) and are sewed closed.

22. This part is a little trickier. You are going to sew an open rectangle, but only on the parts of the mask where the floral folds overlap the solid blue fabric. Begin sewing 1.25" from the far right edge of the mask (not including the straps). Remember to backstitch each end.

23. Turn the fabric and sew a tight seam (1/8" or less) down the side. Stop 1.25" from the end.

24. Stopping 1.25" from the end, turn the mask and sew the floral folds where they overlap the solid blue fabric.

25. After sewing the fold overlaps in place, turn the mask and sew a tight seam down the side until it closes the rectangle. 
 

26. Can you see the open rectangle? It is only open where the flowered flap does NOT overlap the solid blue fabric. (Click on the image to enlarge it to see the seams better.)

27. Open the mask and fold it the opposite direction, like in the image below.

28. Your mask should now look like this (below).

29. Pin where the flaps and folded fabric overlap (on both sides). Pin while mask is folded to get the placement right.


30. Sew the flap in place with a 1/8" seam--just enough to tack the flap open.


31. Repeat on all four corners and remove pins.


32. Cut 54" of t-shirt yarn. I recommend 1.5" wide t-shirt yarn. (For a tutorial on how to make t-shirt yarn: “DIY T-shirt Yarn / Continuous Strand").


33. Thread t-shirt yarn through straps and tie knots on both ends.

34. Loop the mask around your neck. You can wear it like this until you are ready to cover your face.

35. To cover your face, pull on the ends of the ties until the mask fits your face. Tie behind your head.


Alterations:
Instead of using t-shirt yarn ties, create ear loops using hair ties or corded elastic (or even t-shirt yarn). You can place one hair tie inside the set of loops on each side of the mask. 


Check out my other 3D Origami Face Mask tutorials: 

How to Sew a 3D Origami Face Mask (Illustrated)

How to Create a 3D Origami Mask Tracing Template

Resources that inspired my design:


I hope you use Alana Lee Designs Origami face mask design for individual, non-commercial use, and especially to donate to those in need.  But if it helps pay rent and buy food, by all means, please use this pattern.

Thursday, June 13, 2019

Interview with Author {podcast}

Are you still wondering what Starlight Legend is all about? And if it’s for you? (It is.)

You can listen to a 25-minute interview and preview. I discuss my inspiration, characters, the plot and sub-plots, relationship themes, my writing process, and I even read an excerpt. 

I was recently interviewed by the Host of Write on Four Corners,Traci HalesVass, on Farmington, New Mexico’s KSJE 90.9 FM, a station owned by San Juan College where I taught English from 2012-2019. The interview aired on June 12, 2019 and is available to listen to as a podcast at KSJE.podbean.com. (Feel free to listen to the many archived author interviews conducted by Traci—to discover more good reads.)

https://ksje.podbean.com/mobile/e/write-on-four-corners-june-12-alana-lee-starlight-legend/